
Water Conservation/Water Pollution Prevention
Rain Collection Systems
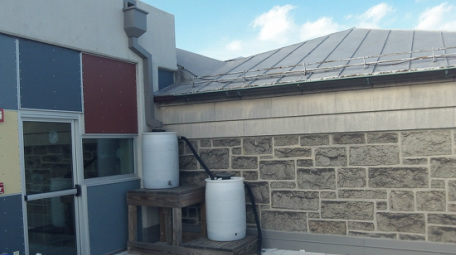
Patterson Park Public Charter School uses industrial and student-made rain collection systems for water runoff from the roof. Water is used for the greenhouse and various plantings around the school.
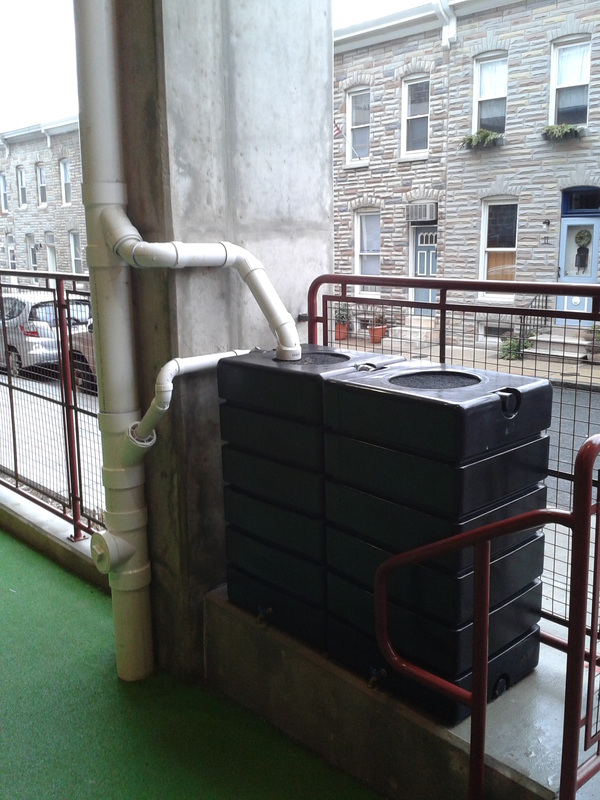
Three years ago, our school hosted a workshop on how to build a rain barrel collection system. This workshop was open to all community members. Below are the steps.
How to Build a Rain Collection System:
- Step 1: You will need
- 1 paint strainer
- 1 - 5 gallon bucket
- 1 - 55 gallon drum w/ a lid
- downspout fittings
- 1 gutter strainer
- 3 cinder blocks
- 1 3/4" spigot w/ 1/4" turn ball valve
- 1 permanent black marker
- 1 jigsaw
- 1 powerdrill w/ 7/8" spade bit
- 1 half-round bastard file
- 1 utility knife
- 1/4" galvanized wood screws
Step 2: Cut A Bucket
The top of your rainwater collection system is made by cutting the top off of
a five gallon bucket. With your 7/8” spade bit already attached to your power
drill, put a hole in the side of the five gallon bucket to get your jigsaw
rolling and cutting easily.
Use your permanent marker and the top of the
five gallon bucket and trace around the top of the 55 gallon drum. Just like
you cut the starter hole on the five gallon bucket, use your drill with the 7/8”
spade bit and put a hole in the top of the 55 gallon drum Follow the guideline
around the top of the barrel. The top of the five gallon bucket should fit snug
in the opening of the 55 gallon drum.
Step 3: Spout It Out
No one likes a leaky spout – especially when the whole point of your
rainwater collection system is to reduce the amount of wasted water. A sure way
to get your spout to fit nice and tight into the bottom of your 55 gallon drum
is to drill a hole using your 7/8” spade bit. Then take your half-round bastard
file and file down the inside of the hole until you have a nice fit and can
screw the ¾” spigot in securely. When you have a good fit, set your drum up on
the cinder blocks.
Step 4: A Proper Fit
Using the existing downspout from your gutters, add and extension to run down
into the collection barrel. Any hardware store will carry a variety of
extension and fittings for this. Make sure to save the receipt so you can
return any of the un-used fittings.
Measure and mark where you need to cut the fitting so that the end will run into the top of your rainwater
collection barrel. Most fittings are made of flexible plastic and can be cut
with a utility knife. It may be necessary to use a “splice” to fit the end of
your existing downspout into the extension. Push these two pieces together
until they are nice and snug. Use brackets to secure the fitting to side of
your house.
Step 5: Strain The Drain
Standing water can be a haven for mosquitoes. An important thing to keep in
mind when putting together your rain collection system is to make sure and
secure a paint strainer to the top of the bucket. This will keep large objects
and mosquitoes from getting into the barrel and spoiling your water supply. To
prevent the collected, organic matter from hanging too far down into the rain
barrel, tie a knot in the strainer before installing it into the lid.
Downspout Planters
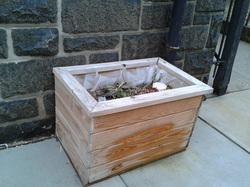
Parks and People, along with students at PPPCS made, decorated and planted these planters. The planter is attached to the downspouts so that the runoff from the roof is filtered and used to water native plantings.
